

Spring yard cleanup hits differently when you manage your own property…
On larger lots and rural acreage, debris doesn’t just disappear, but rather just accumulates when the season changes.
By the time you’re ready to tackle it, you’re not dealing with a small stack of branches… You’re dealing with some real volume.
For many landowners, hauling everything away isn’t practical. It takes time, equipment, and usually more than one trip. However, letting it sit isn’t a great option either.
Most people just want a straightforward and practical way to reduce the pile and move on.
This is where a contained burn barrel, or incinerator, makes sense. When used as part of your routine land maintenance, these units help you manage on-site debris and prevent seasonal buildup from becoming a bigger problem.
What to Do When Your Yard Produces an Absurd Amount of Debris
Vines pulled from fence lines.
Brush cut back from barns and sheds.
Fallen limbs from winter storms.
And now you’re staring at a heap of debris and wondering:
- Do I rent a dumpster?
- Do I contact a haul-away service?
- Let it sit and deal with it later?
For rural property owners, those options aren’t always practical. Hauling takes time. Pickup isn’t guaranteed. And letting it sit just means an even bigger pile later on.
For many landowners, using a contained burn barrel to reduce on-site debris is the most efficient way to manage large seasonal buildup.
6 Steps to Get Rid of Spring Yard Debris Using an Incinerator
Cleaning up a large debris pile doesn’t happen all at once.
It’s much easier when you break it down into manageable pieces and approach it with a plan. A stainless steel incinerator lets you reduce that volume steadily, rather than trying to tackle everything in a single afternoon.
The steps below will guide you through a straightforward approach to spring yard debris cleanup using a stainless steel incinerator, so the process feels controlled rather than chaotic.
Step 1: Identify Burnable Volume
Before lighting anything, take a realistic look at the task at hand.
Spring yard debris has a way of feeling bigger than it actually is. What looks overwhelming at first is usually just volume that needs to be reduced in stages.
Pay attention to where debris tends to collect (along fence lines, near outbuildings, at the edge of treelines, etc.). Those recurring spots often account for most of the buildup.
Take note of the actual volume you’re dealing with and where it’s located. Seeing the scope clearly makes it easier to plan the reduction process rather than reacting to a single large mass at once.
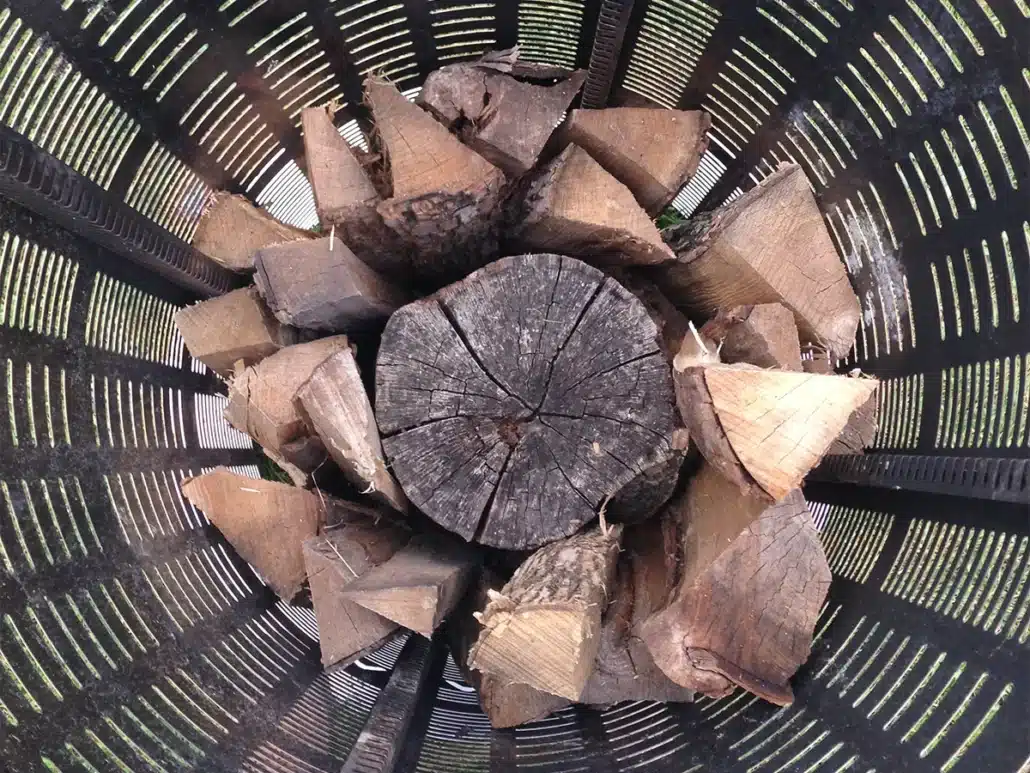
Step 2: Break Down Oversized Material Before Burning
Once you’ve identified what can be reduced, it’s time to get it into burn-ready condition.
Large limbs and tangled brush rarely burn efficiently when dropped in whole. Whip out that old chainsaw if you have to, and cut oversized branches into manageable lengths so they fit cleanly inside your incinerator. This helps prevent material from catching across the top and restricting airflow.
Separate dense brush so it isn’t tightly packed before feeding it into the unit. Air needs space to move around. When you have smaller, looser loads, it helps keep the burn steady and under control.
If any of the material is green or damp, set it aside to dry. Drier debris burns hotter and more completely, keeping smoke down and helping reduce volume more efficiently.
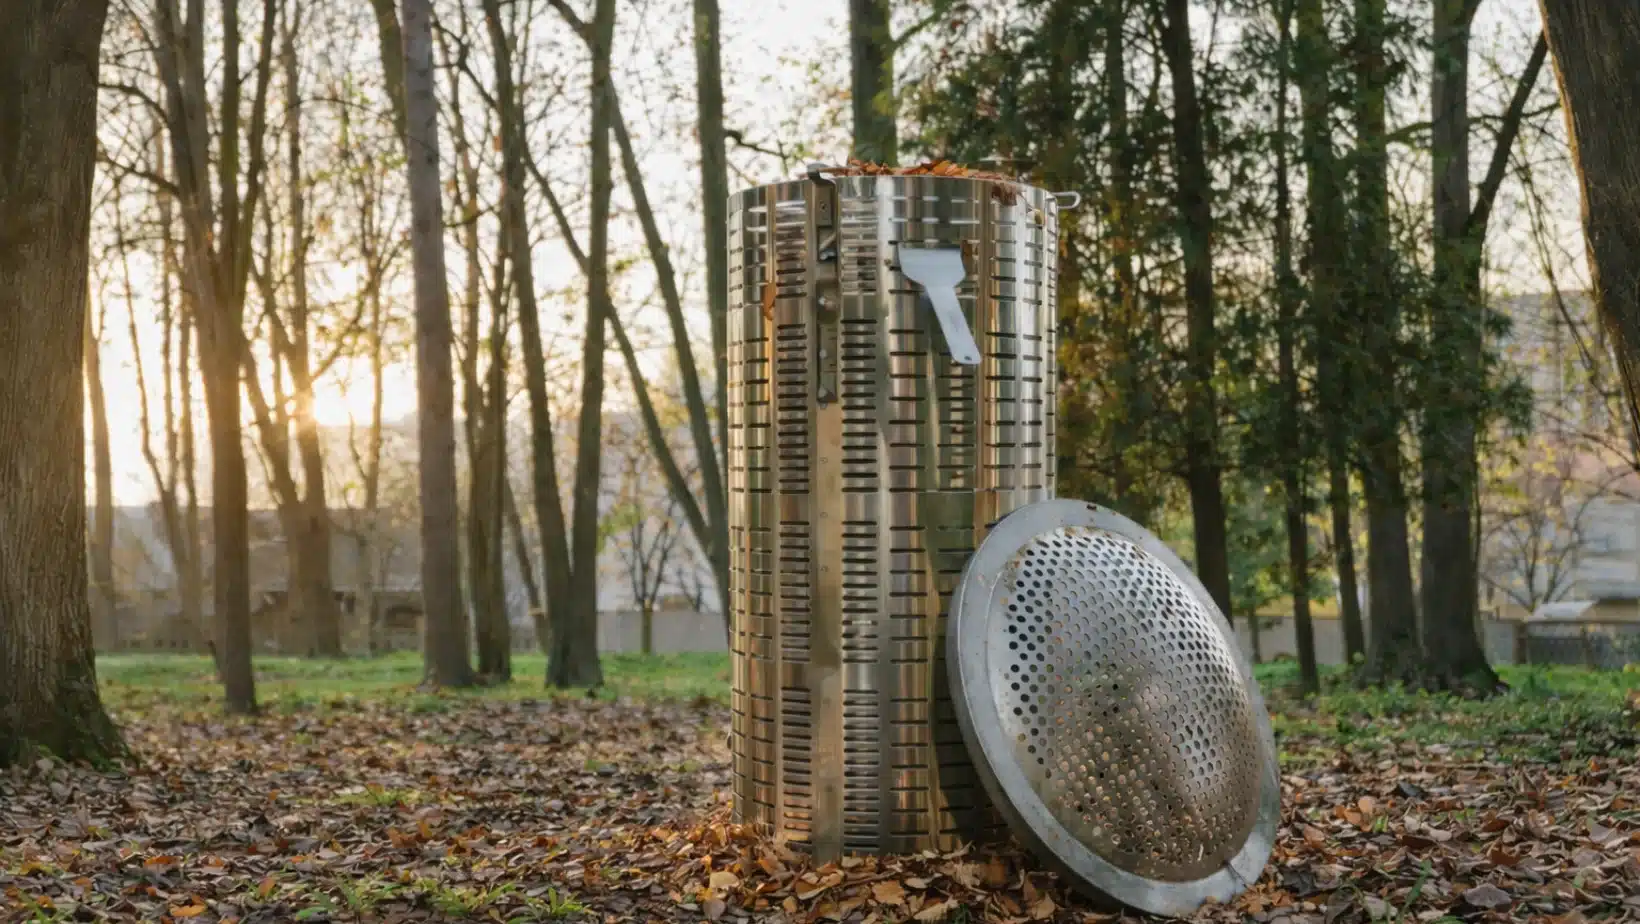
Step 3: Get Your Incinerator and Burn Area Ready
Before you begin burning, make sure the burn area itself is ready.
Place your incinerator with the optional ash catcher on a flat, level surface that isn’t flammable (think a stone base or a driveway). Uneven ground can affect stability, and a combustible surface creates unnecessary risk. Choose a spot with clear overhead space and enough room around the unit so shifting embers isn’t a concern.
Before you begin loading materials into the unit, take a minute to make sure your incinerator is properly set up.
This means it’s fully assembled and tightened, so nothing shifts as the heat builds. Any internal supports or airflow components should be properly in place, and the lid or cover should fit securely.
Step 4: Burn in Controlled, Measured Loads
When it’s time to begin, resist the temptation to toss everything in at once.
Your burning unit performs best when material is added in manageable amounts. Overfilling it can slow the reduction process and make it harder to maintain a steady burn.
Start with a smaller load and allow it to break down before adding more. Let the material break down fully rather than stacking fresh debris on top too quickly.
Steady, measured loads reduce debris more efficiently than trying to eliminate the entire task in one go.
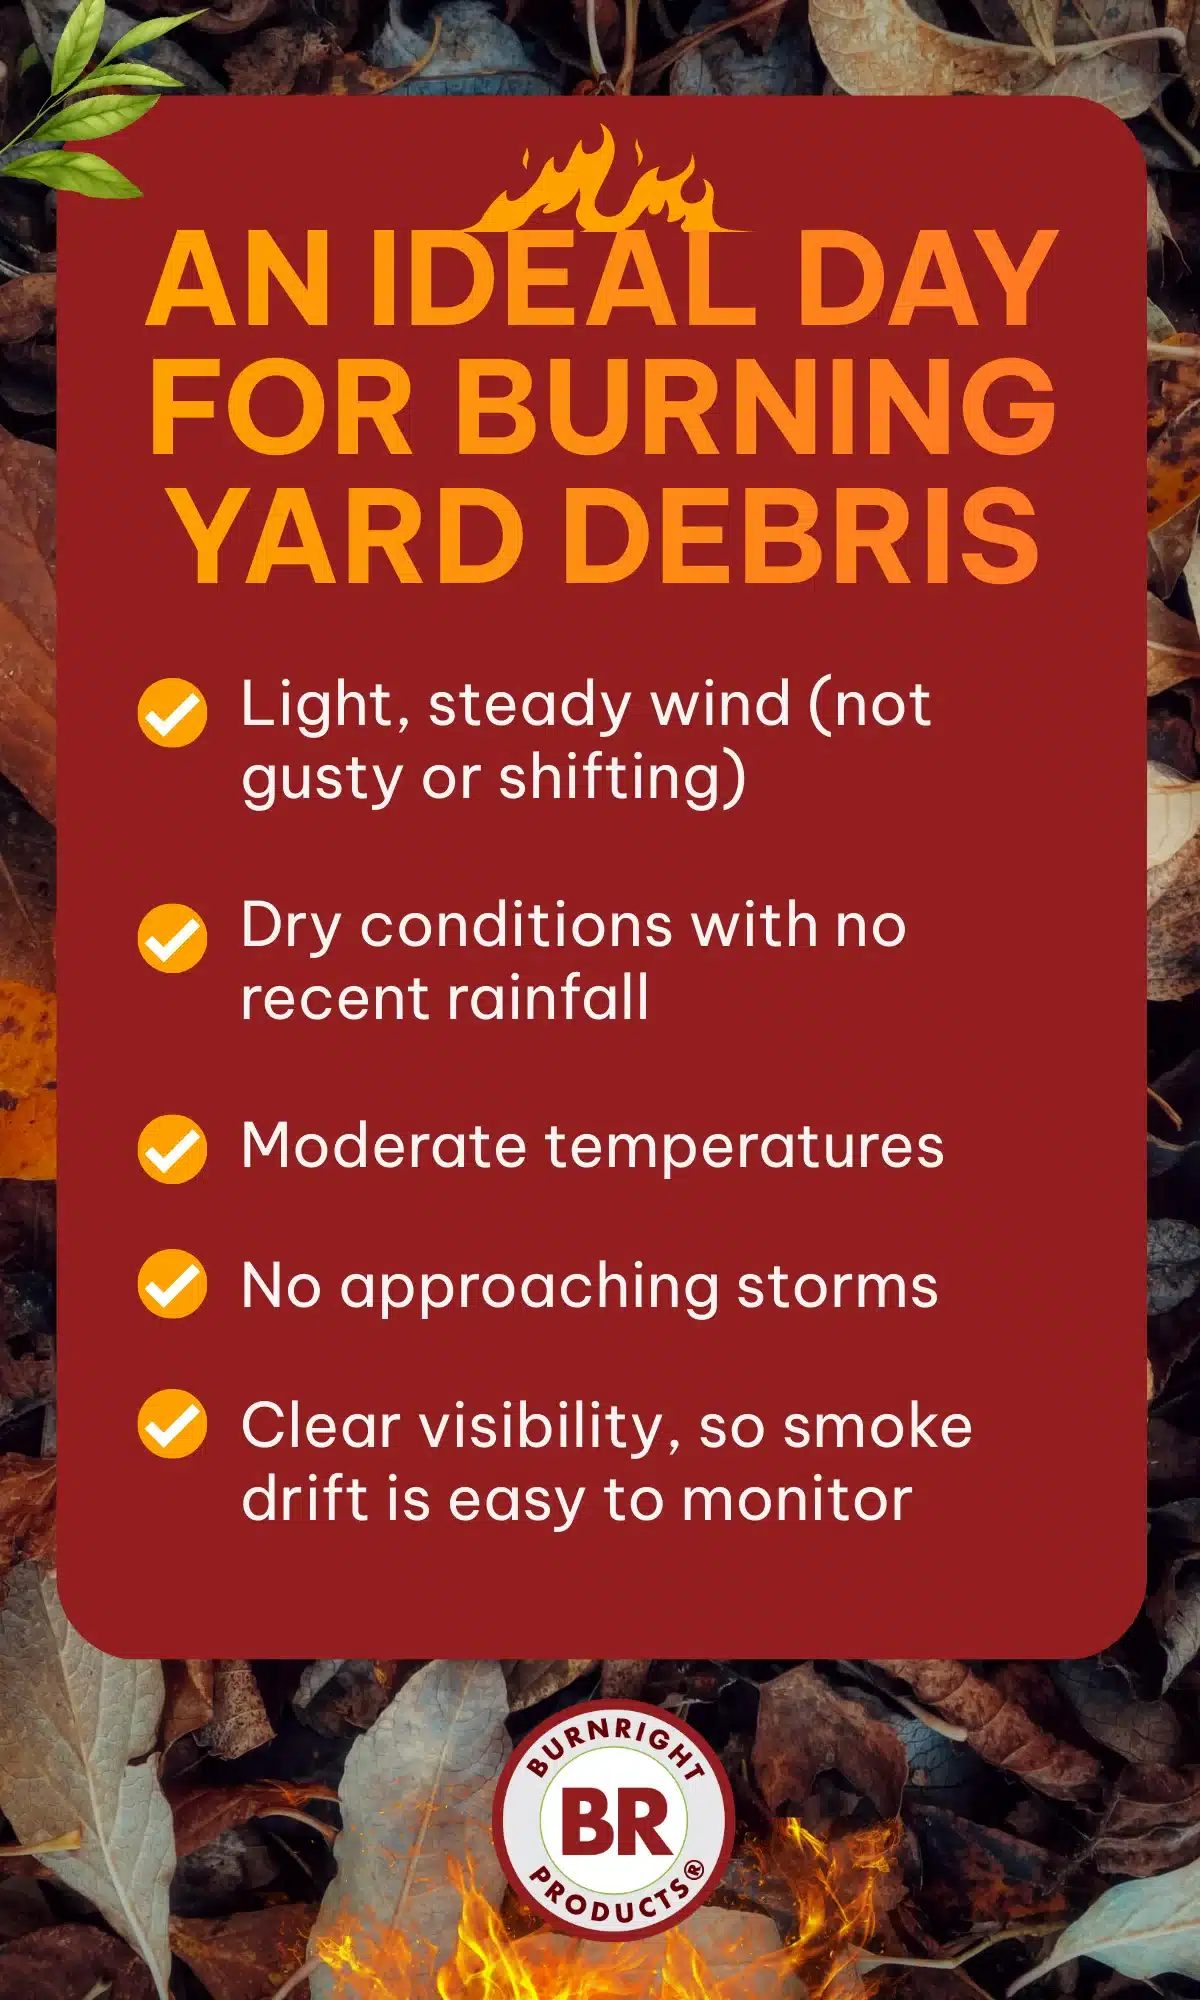
Step 5: Choose the Right Conditions for Efficient Combustion
Even with everything staged properly, the day you choose to burn matters.
An ideal burn day usually looks like:
- Light, steady wind (not gusty or shifting)
- Dry conditions with no recent rainfall
- Moderate temperatures
- No approaching storms
- Clear visibility, so smoke drift is easy to monitor
Gusty or unpredictable wind makes it harder to manage the burn and can carry heat and embers farther than intended.
Check the forecast before you begin and stay aware while the unit is in use. If the weather shifts, pause and reassess rather than trying to push through.
Keep a water source nearby and stay present while the burn is active. This isn’t something to light up and leave. It only takes a second for things to get out of control.
Once the burn has finished and everything has settled, there’s one more part of the process that often gets overlooked.
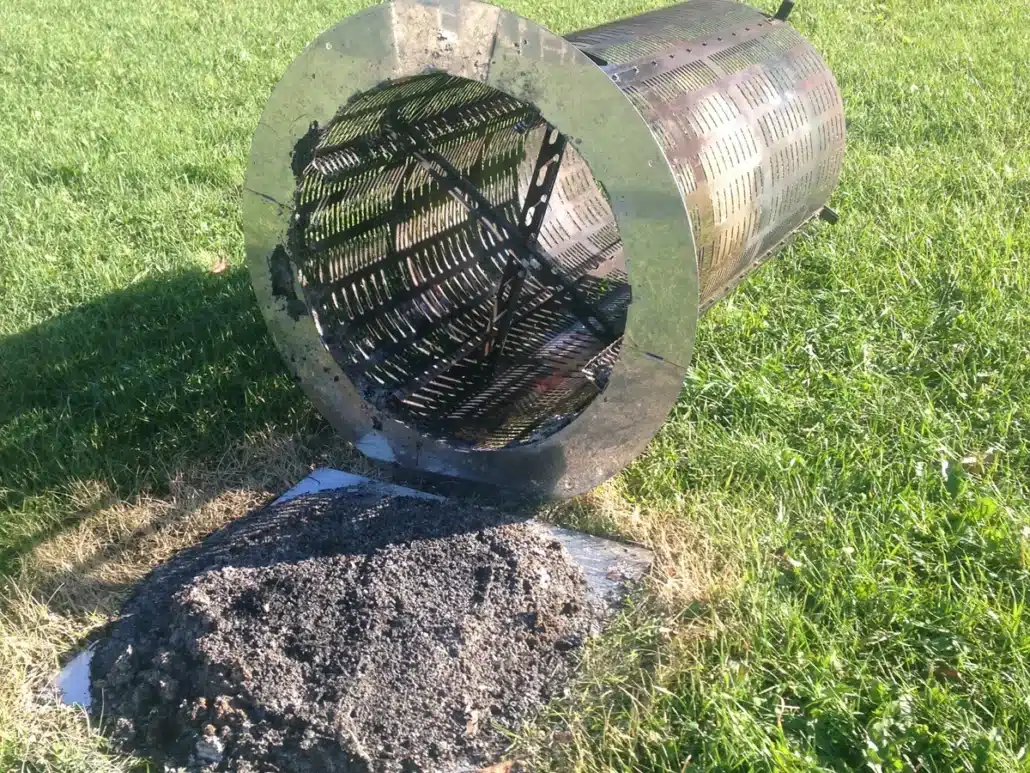
Step 6: Manage Ash and Stay Ahead of the Next Pile
Once the burn has finished and the material has fully reduced, give the unit time to cool completely before handling anything inside.
Ash buildup should be removed regularly rather than left to accumulate. Allowing ash to accumulate at the bottom over time affects airflow and makes future burns less efficient.
Dispose of cooled ash responsibly, and return the incinerator to its normal position if it was moved during cleanup.
Taking a few minutes to reset the burn area after each session keeps your unit ready for the next batch and prevents debris from quietly rebuilding into another oversized task later in the season.
Burn Right® Products: Built for Safer, Controlled Spring Burning
Spring yard cleanup isn’t a one-time event. For most rural properties, it’s part of a seasonal rhythm. The right tools make that process more manageable year after year.
Burn Right® incinerators are built from high-grade stainless steel, designed to withstand repeated high-temperature use.
Unlike improvised barrels or temporary setups, these units are made for long-term, repeat use. When spring cleanup rolls around again, you’re not starting from scratch; you’re continuing a system that works.
Contact us today to learn more about choosing the right incinerator for your needs.